3D Printing Experiences and Info
This is a list of tips and links about 3D printing in general. There will be some specific to the Creality Ender 3 and the Monoprice Mini Delta because I own both of those printers and have some bit of experience with them. I will talk about general 3D printing and related topics also.
NOTE: This is a work in progress. It may appear jumbled and there is no doubt duplication. Hang in there while I work through getting the stuff populated.
Section Links
Monoprice Mini Delta Experiences
Selecting the Monoprice Mini Delta
The Mini Delta turned out to be my first printer and as such the selection process is a bit different.
I knew NOTHING about 3D printing before I started investigating so I didn't know what I was getting into at that time. Research, something I ALWAYS do for any significant purchase, was the key to making the right choice for the situation. I searched the web and found that there was a LOT of information in video form on YouTube. I watched a LOT of videos and learned a lot about how 3D printing worked and the kind of problems I could expect. The more I researched the more convinced I was that this was just the kind of thing I could get interested in. I love a challenge that I can put my unique set of problem solving skills into.
Probably more so than on other acquisitions, I made up a list of what I thought I wanted in a 3D printer:
- Inexpensive - $200-$250 for the printer and any supplies I would need to get started.
- Easy Setup - I had noticed that some of these printers were FULL kits requiring a full day or more of effort to assemble. I didn't think I wanted to invest that much time and effort into the first printer.
- Support - There was community support around every printer I looked at but I was also concerned about manufacturer/distributor support services.
- Availability - This turned out to be a non-issue but it was something I looked at.
- Print Build Size - Although this was a factor I didn't consider it to be really important. I thought that I would only be printing mostly small stuff.
- Construction Type - I didn't want something that was flimsy or poorly designed. I had learned that rigidity was an important factor for getting a quality printer.
- Maximum Nozzle Temperature / Heated Bed - I wanted to be sure that I could print with my material of choice (whatever that was going to be) so I wanted to be sure that I could heat it up to whatever temperature was necessary. I had also learned that a heated bed was pretty important to getting the part to stick to the build surface.
- Known Issues - Every printer had it's problems but I found that there were usually fixes for those problems that I could buy cheaply or even print on the printer itself.
- Open Source - I'm a firm believer in open source so that the community can see what is going on and offer fixes as necessary. I did not consider this particularly important for the first printer though - I just wanted something that would work.
I made my selection of the Mini Delta because it was inexpensive ($169), had a good community behind it, was of sturdy construction, and would be ready to print as soon as I could unpack it.
I do not regret selecting the Mini Delta for my first printer. It served, and still serves, well. I admit that I don't print as much on it as I do the Ender 3 but for small parts it is superior to the Ender 3 because it is faster and prints PLA flawlessly. Mostly it showed me a whole new world of interesting things I could do with 3D printing and promised to keep me challenged for some time to come. I refuse to let my mind and skills atrophy!
Ordering the Mini Delta
I ordered the Mini Delta on the day after Christmas 2018 figuring I would avoid the pre-holiday rush. I was right. It arrived BEFORE 10 AM the following day (Thursday).
That was QUICK - too quick! I had ordered one spool of filament (Hatchbox PLA in silver) the same day as the printer but didn't know when it would arrive. I looked at MatterHackers and found that almost everything was out of stock. I procrastinated and didn't order until the next day (Friday) and then it wasn't what I really wanted. It turned out that the PolyLite (in red) that I did order turned out to be a really good choice.
When the printer arrived I had to scramble to make a place to set it up. I had decided that my desk in the library, which I never really use, was the perfect place. Being in it's own room had some advantages. Unfortunately, after I unpacked the printer all I cold do is sit on the desk, turn it on, look at the menus, and watch it swing around the hot end a bit. Not very exciting.
I wasn't idle during the filament waiting time. I spent the time pouring over the excellent Monoprice Mini Delta Wiki information on the web and learning about slicers - Cura in particular.
The First Print
Amazon came through with the first filament on Sunday (NOT what I expected) and I was able to print off the 'test cat' that came on the included tiny (128 MB) micro SD card. It printed flawlessly as you would expect. A silver cat is kind of odd looking though. Being the first print ever the little guy holds a special place in my memories though.
To be fair though you can expect any test print shipped with any printer has to be something that has been tweaked so that it almost can't fail. I looked at the gcode some time later and there was no doubt that almost everything about this print was done very conservatively
I should mention that the Mini Delta has auto bed leveling which made getting out the first print far too easy. There is zero setup you have to do to run that first print. You don't really appreciate auto bed leveling until you have a printer that DOESN'T have it.
What Next?
I have to admit that I don't remember what I printed next. It's a good thing that I kept a log book! Yes, I log EVERYTHING (so far) I print so I'm able to look back at my successes and failures to see the progress I've made. It's also a good source of what NOT to do.
Consulting the log ... surprise! It was a 3D Benchy - the standard benchmark test for all 3D printers. There were problems as you would expect. I was printing too hot (210) with too cold of a bed (30) and nothing was adhering right. I adjusted the temps (190/40) but still a failure. Tweaked some more startup things and it's printing but the first couple of layers were too close to the bed. It did print though. I had altered the starting gcode per info from the wiki and hadn't fine tuned it yet. Not a great print - lots of stringing but otherwise pretty good.
The red PolyLite arrived on Monday and I decided to print a test cube (20mm) to see how the calibration was. Several adjustments of the Z offset and I got a good print.
I printed a filament clip for the HatchBox reels OK but it had some stringing. Not a real problem. I also printed a couple of different sizes of a cable clamp. The skirt (and part probably) squished out too much and became attached. Turns out the distance to the skirt was too close (1mm) along with the high squish. I tried a raft and glue stick and that worked ... but.
Next print was the Razor Blade Handle. This is a handle that you put a single edge razor blade in. It makes a great part removal tool for small parts (and for starting on larger parts). More tweaking of the start gcode and finally got the Z offset close. It ended up too small (as I should have known from the test cube) and I ended up reprinting after upsizing by 2% in Cura. There are still issues with the finished print but it is still functional.
Next was the filament guide. Watched for the first 5 minutes and all was well. I checked it every 20 minutes thereafter. I took 4 1/2 hours to complete but produced a functional, if not perfect (needed support!) part.
Over the next day or so days I printed test cubes and a stringing test. I printed the first Delta Shield (to keep junk out of the bottom compartment) and there were issues but nothing that would affect function. I printed two more that were less than perfect but functional.
More Refinement and Useful Parts
I continued to tweak the Z offset and eventually got it right. Changing retraction distance also resolved the stringing issues.
While tweaking stuff I was print a different filament spool clip which also turned out to not be too great. They're small so it's not a big deal if they don't work out.
I finally found a good filament spool clip. It's called Khalessi Clip and it works great on all of the spools I have. I eventually set up a gcode file that prints six of these at once and still use the Mini Delta to print a batch as I acquire more filament.
I had found a set of 'legs' to raise the printer up some and provide a spot to put the SD card holder/extension. They had a test sizing part (how did they know?) and I found that 101% would do the trick with the new gcode prefix provided from a wiki link. A little stringing but it will be OK. Have to wait for the cable now.
Next on the useful list was an unexpected surprise. My friend Dave has an HP 2200 laserjet printer that the manual tray door won't stay closed on. It's a common problem and you can't buy (for a reasonable price) a replacement door because they have all broken. I figured it was worth a shot to search Thingiverse just in case and was pleasantly surprised that someone actually had developed a solution for this problem. It's a tiny part that wedges in the side of the door and provides a new way to keep the printer closed. It was a 5 minute print and I used a piece of the PolyLite Red that had broken off on an earlier print. I only had about 30 cm available but it was enough (it's a tiny part). It's working perfectly!
I decided to print the other two legs (it's a triangle so only 3 legs) - one with 6mm holes for switches and one plain. It turns out that the one with the 6mm holes really has 12mm holes and wasn't useful. I caught it early and cancelled it. I just printed 2 plain ones to do the job.
The cable for the SD card came the next day so I installed the legs and the SD card cable. It's MUCH easier to handle full sized SD cards - actually a micro SD card in one of my many adapters.
Just for reference, the Mini Delta is VERY picky about SD cards. I have several of various sizes and I can only get one 128MB card (came in my Garmin GPS) and a 16GB card that work. I have no idea why only these two work and it's not the card size - I've tried a 256MB, a 2GB, and a 8GB card and could not get any of them to work. They do work just fine on my Ender 3 though.
Printing Toys
There are thousands of toys and other novelties on Thingiverse. I'm not immune to the attraction of such things either.
I've printed a Gearicon - an odd shaped not-quite-sphere that rolls in an odd fashion. I've also printed the 'Stick Man' but had to downsize him to 88% to make him fit on the bed of the Mini Delta. He came out fine but now the seeds of a bigger build surface are planted ...
I've printed a 'Wobbler' that I saw on Maker's Muse but again had to shrink it to fit - this time 50%.
The 'Nautilus Gears' are one of my most loved toys. People are amazed to see how it works. I wasn't able to get it all on the bed at once so I printed the gears and connecting bars separately. I took that opportunity to print them in different colors - red and white.
More Enhancements
I printed two more enhancements for the Mini Delta:
- Spool Cover - a part printed in PLA that sits on top of the standard spool holder to reduce the rotating friction of the spool. I did this one after I noticed that the spools seemed to drag a bit. There are other designs that use skate bearings to provide a really low resistance but I didn't have any of them and figured I'd give this one a try. It seems to work just fine and I'm not planning on anything more elaborate.
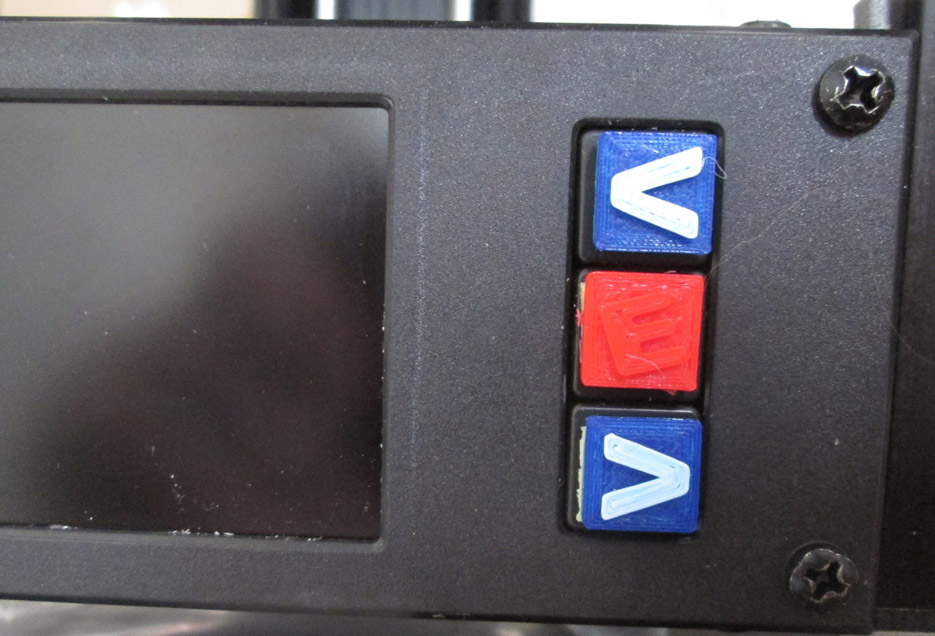
- Button Arrows - If there's one thing that should change on this printer it's the nearly invisible buttons for the display. The printer frame is black and so are these buttons. They are VERY hard to see if you don't have good lighting (or a flashlight). These buttons can be printed in whatever more visible filament you want and then stuck on to the buttons with double sided tape. I printed the middle button (Enter) in the red PolyLite. I printed the left/right buttons in the MatterHackers blue - except for the top raised part that I printed in white. I paused the print just as the raised part was starting and changed out the filament. This is a very manual and tricky thing to do but it's so satisfying to see it work.
Adventures with PETG
I knew that I was eventually going to try out PETG filament and it only took me a couple of weeks to decide to order some from MatterHackers. I picked black just because it seemed like the right color to pick and I wouldn't mix it up with any of my other filaments.
First rule of PETG is it is hygroscopic - You MUST keep it in a sealed bag when you're not printing with it to keep moisture out.
Switching filaments to PETG is easy since PETG likes a warmer nozzle temperature - just switch and you're good to go. Switch back to PLA is a little different. You need to warm up the nozzle to PETG temperature (240 should be good) and then feed your PLA in. Cool it back down after you get a good flow of the PLA through the nozzle. I shouldn't have to say this but make sure you use a distinctive color change so you KNOW when all of the PETG is pushed out. White works perfectly after using the black PETG.
My first experiments came about the middle of January and I had been doing a lot of research on how to do it right. Bed adhesion was an issue to address because I was not going to print directly on the bed - a potential disaster because PETG has a reputation for BONDING with various build surfaces. Time for painter's tape. I bought some inexpensive blue stuff and covered the bed with it.
Before the PETG I printed a test figure (MatterHacker's Astronaut Phil-A-Ment at 50%) in white PLA. I switched over the PETG filament (and re-sliced the model for PETG), laid down the tape, and printed at 235/55 temperatures. All went well and I thought I was home free.
Alas it was not to be. I printed off a snap strength test piece and was rewarded with massive curl. The blue tape would NOT stay stuck to the bed when it was heated. Phil-A-Ment didn't have this problem since only his feet were on the bed which was a much smaller area and length.
I tried lowering the bed temperature to 40 but that didn't really help. I tried no bed heat and glue stick and that kind of worked but still got curl. I decided that the tape just wasn't going to stick and decided to look for a better tape.
I found GREEN painter's tape that is made for sticking on concrete and block and decided to give that a try. What an odd smell it has! Not too obnoxious and I figure it won't really be a problem to use. This stuff really sticks good - even when heated to 50C for the fist layer and off for the rest. I used the glue stick too and had no adhesion problems. This stuff REALLY sticks good and you can expect to remove the tape where the part lies to recover your part. Not really a bad thing though.
Although I've solved the secrets of printing PETG I think I'll be reserving it's use to those parts that really need it.
See 'More Adventures with PETG' below for the continuing saga.
The First Disaster
I printed one more Astronaut Phil-A-Ment while tweaking the Z offset a little more and he adhered just fine. It was going well and I left him to print on his own.
Sometime later on ... and I come back to see the disaster. Phil has unstuck himself from the bed and there is filament spaghetti all over. What a mess! I clean it up and things are still not sticking. It's late in the day so I decide to work on this the next day.
A couple of days later I had tried another print and had some problems with curl (with PLA?) but that was not the real problem - it was only a symptom.
In the process of switching back to PLA I had encounter a clog. I had to disassemble the hot end and get things cleaned out. I had watched a video of how to do this (actually for the Mini Select which uses the same not end) some days before and was confident that I could do it. Unfortunately I left out something - you MUST heat up the hot end before you re-install the nozzle. This caused the nozzle to leak and there was plastic all over the hot end.
The real reason Phil had detached himself from the bed was that he was knocked over. A glob of plastic had dripped on to the top of the print and then hardened. When the nozzle came back across that area it forced him to slide off of his position.
Cleaning up the mess was no simple job. The insulating blanket (cotton and Kapton tape) was soaked with hardened plastic and would have to be replaced. The threads on the nozzle, heat brake, and heater block were gunked up with hardened plastic.
I ordered a replacement insulating blanket (comes only in 2-pack so I have a spare) and had to wait a week for it to show up. I did clean up the threads on the nozzle and heat brake with a brass wire brush. No problem with that. The threads inside the heat block required a tool though - a 6mm tap. I had to buy one and that was about $7. I later bought a set of metric taps - which I should have done in the first place. That all worked just fine.
I cleaned things up a bit but to get the blanket off I had to remove the thermistor. This is a part that is held in the heating block by some high temperature silicone. One more thing to buy ... another $7 spent cleaning up this mess.
To clean up the hardened plastic on the heater block I had to heat it up. I of course had to reinstall the thermistor and arrange the whole thing to just hang in the air so I could grab it with some pliers and scrape the gunk off as it got heated up. This was an exciting job and it took far longer to get it set up than it did to actually do it.
I put it all back together (properly this time) and it all worked just fine. A lot of work and about $20 in parts and tools and about 10 days later it's working again. I'll never make this mistake again!
The Next Problem
You didn't think this was all easy and foolproof did you? I've found that 3D printing is a series of challenges and trials for your wits. I love it! The biggest problem ALWAYS seems to be first layer adhesion even with the Ender 3.
I had looked for replacement coasters some months ago for my 24 ounce (.75 liter?) water tumbler and wasn't finding any good choices. The idea resurfaced and I went off on Thingiverse to find one. I found what I thought would work and it would JUST fit (100 mm diameter) on the Mini Delta.
This would be a near maximum sized print and I thought it would put the Mini Delta through it's paces. Cura showed it as a nearly 4 hour print so I fired it up and watched as it started. Adhesion near the back 'corner' of the triangle (the front is actually the face to the left of the display) was horrible - but it was working so I let the print finish. It was on the bottom so wouldn't be that visible.
I had been having this problem with other prints and tried a couple of things that didn't really help. Looking this over I got the impression that the bed leveling wasn't getting a good read in that area.
The standard leveling read is one probe point for each of the three corners of the bed. I knew that the firmware was capable of better so I changed it to a 4x4 grid (which turns out to be a 2-4-4-2 grid - think circular) and that was better but still not right. I then had the idea that there was something wrong with the limit switches on the bed. I removed the bed (three turn clips), carefully not over stressing the wiring, and checked the switches. Nothing wrong with the switches but there was a small piece of filament in there. Removing that solved the problem.
It turned out that these coasters weren't really big enough - I also need to accommodate a slightly larger bottle of Powerade. I found something on Thingiverse that I printed on the Ender 3 at 110mm in diameter - too large for the Mini Delta.
Printing for the Ender 3
By the middle of February I had decided that I was ready for something more. The Mini Delta is a fine printer but it's limited build area was keeping me from printing some things. I went back to my printer choices list that I made up for the first printer and adjusted my priorities. I also checked out a couple of other printers but in the end the Ender 3 won. It was the second choice before and I hadn't changed my criteria that much (build volume was much higher on the list this time).
The Ender 3 has several additional upgrades that it needs and I could print some of them on the Mini Delta before the Ender 3 arrived. There were about a half dozen parts that the Mini Delta did a fine job on those parts.
It seemed a bit strange to be printing parts for a 'replacement' printer on the Mini Delta. The Mini Delta is not ignored though.
The New Role for the Mini Delta
The Ender 3 has become my primary printer but the Mini Delta still has a role to play. If a part will fit on the Mini Delta I still sometimes print it there, especially if I need a little more speed. The Mini Delta can print faster than the Ender 3 due to it's delta style design. It becomes the prime candidate if the Ender 3 is printing something that takes a long time. I have occasionally run both printers at the same time. I probably need to do that more often than I do. I think I'll take using the Mini Delta more as a challenge so it doesn't feel left out of my 3D printing life.
More Adventures with PETG
I decided that I was going to use the Mini Delta to print off a bunch of small circuit board clips (only 20 mm wide) and fired it up to do the job. The big advantage of the Mini Delta is it's speed. It's easy to run PETG at 80 mm/sec as opposed to the Ender 3's 50 mm/sec. Other speeds are also correspondingly faster. I was going to be using the PolyLite PETG (orange) and had had some good success on the Ender 3 so I sliced the model and printed a group of 6 of them.
Well, that didn't go well. I had terrible layer adhesion and the part turned out to be junk. What went wrong?
There are a LOT of differences between the profiles on the Ender 3 and the Mini Delta so I started tweaking the Mini Delta settings to match the Ender 3 as much as possible. I think the biggest problem was the temperature. The Mini Delta was set for 235 and the Ender 3 was 240. I know, 5 degrees is not much but after a bit of research I found that even higher might be better. So I set things for 245.
The other problem is that the Mini Delta struggles to make a bed temperature of 50 let alone 60 so I settled for 50 at the start and lowering to 40 after things get started.
There were other things that didn't seem right either:
- A line width of 0.35 mm instead of 0.40. I changed it to 0.40.
- Retraction on layer change was turned on - I turned it off.
- 105% extrusion on first layer - I changed it back to 100%. It probably didn't make a difference though.
After these changes I got a good print. I had to correct the hole in the part though. I had squished the part width in MeshMixer after I put in the hole - which makes for an oval shaped hole.
I have a set of 3 sliced and waiting to try out tomorrow and if they work I'll expand that to 6. I'll need to print at least 3 sets of 6 to get the quantity that I need.
Stringing is still an issue but it's the way PETG is. I can live with it as I'm not looking for a beautiful part so much as a functional one. A little quick cleanup with a deburring tool does the trick.
Photos
A few photos from the Mini Delta:
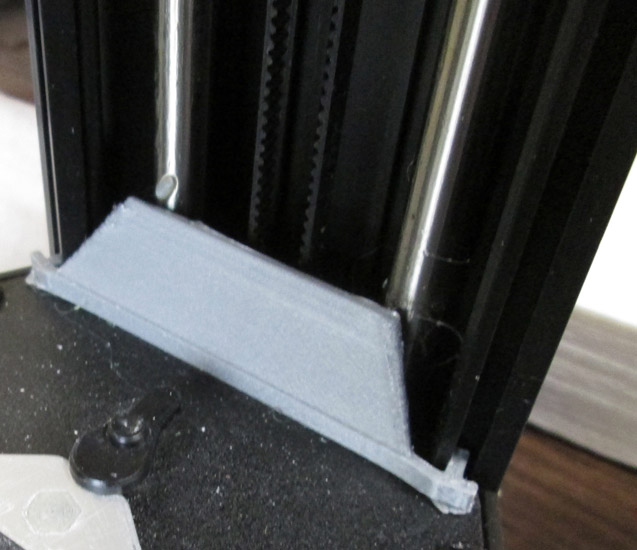
Filament Guide
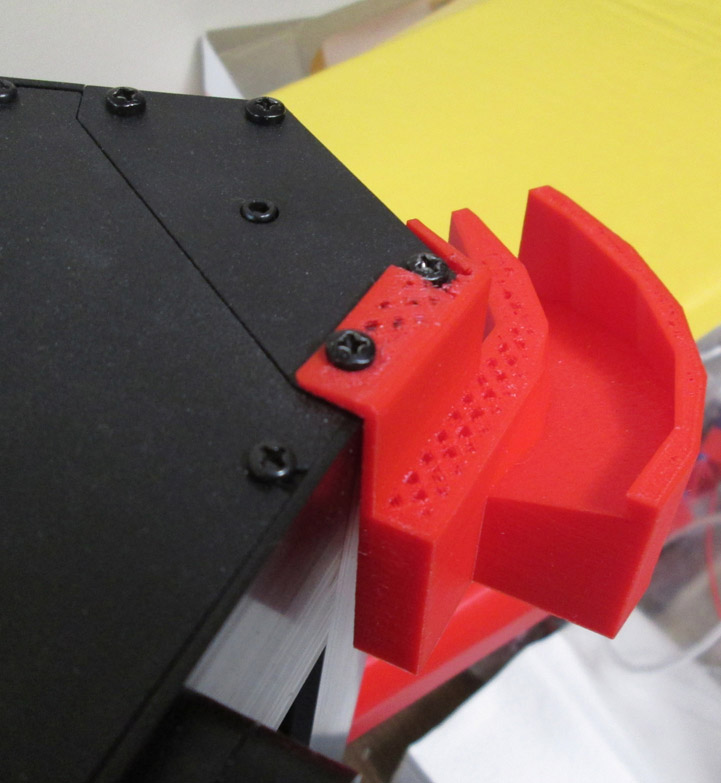
Inside Leg Shield
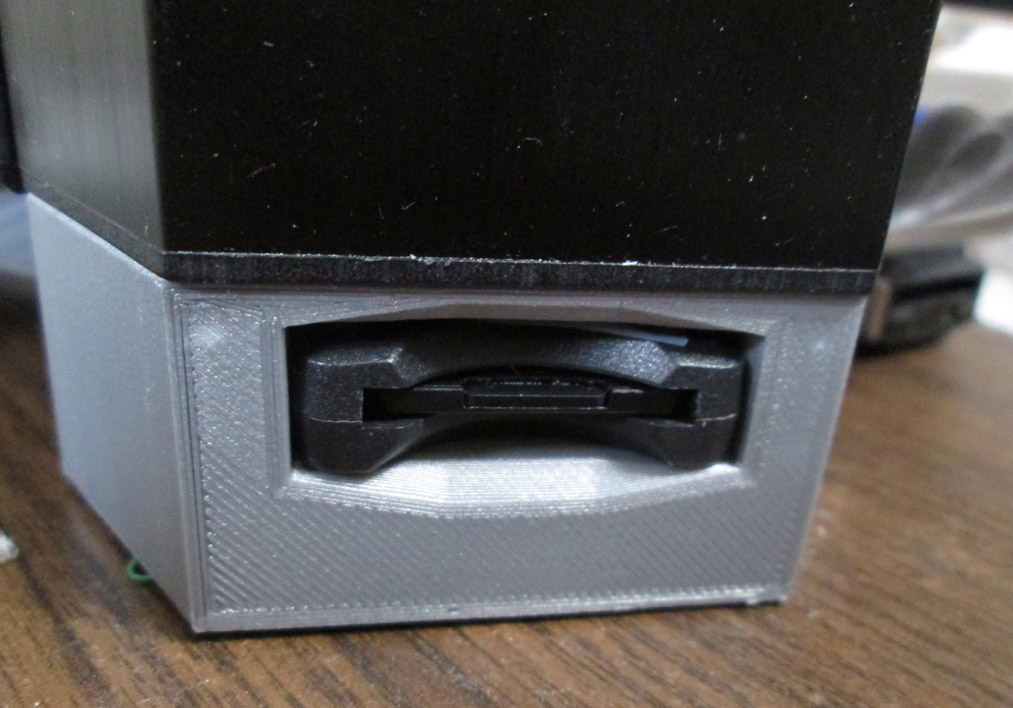
SD Card Leg
Spool Holder Cover
Control Panel Buttons